

Choose a sending mode
Sendify supports branded sending and platform relay.Branded sending
All technical layers of the message use your domain. This gives you the clearest brand identity and an independent sending reputation.Platform relay
Recipients still see your branded From address, while Sendify handles MailFrom and delivery.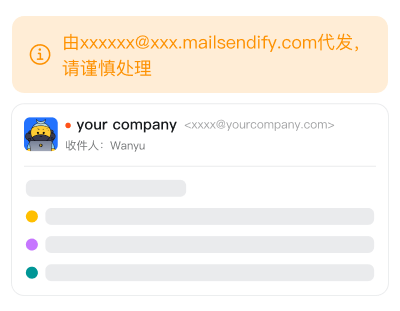
Add a sending domain in Sendify
System Management → Domain Management
1
Enter the sending domain
Sign in as an administrator and select Add sending domain.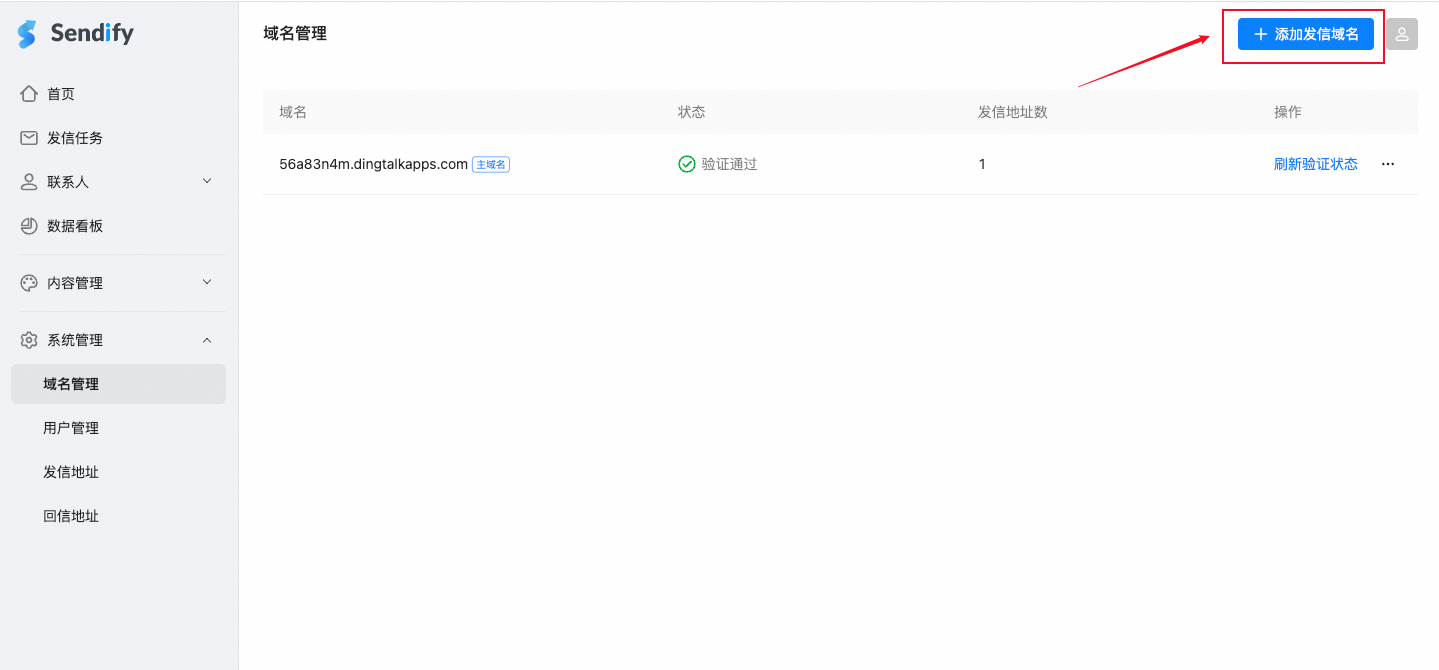
mail.yourcompany.com or mkt.yourcompany.com.2
Choose a sending mode
Select branded sending or platform relay based on the tradeoffs above.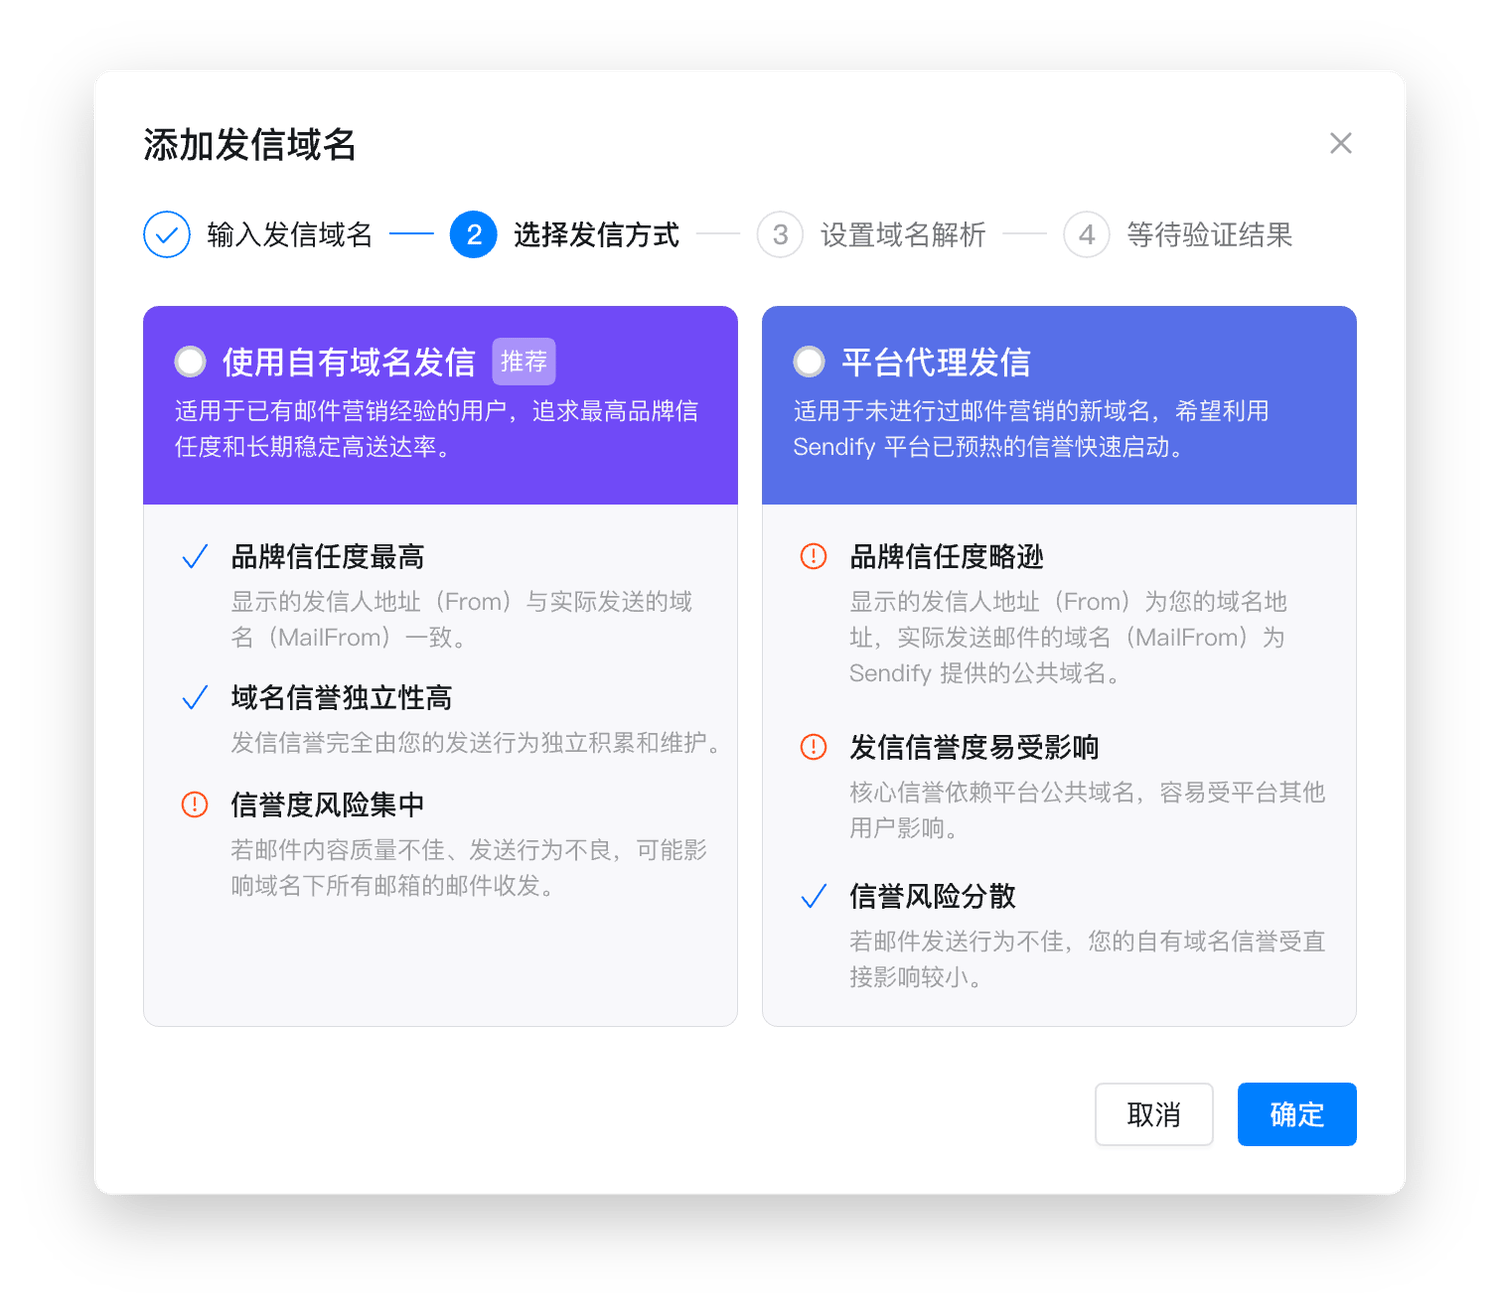
3
Configure DNS records
At your domain registrar or DNS provider, add or update the host names, record types, and values shown by Sendify.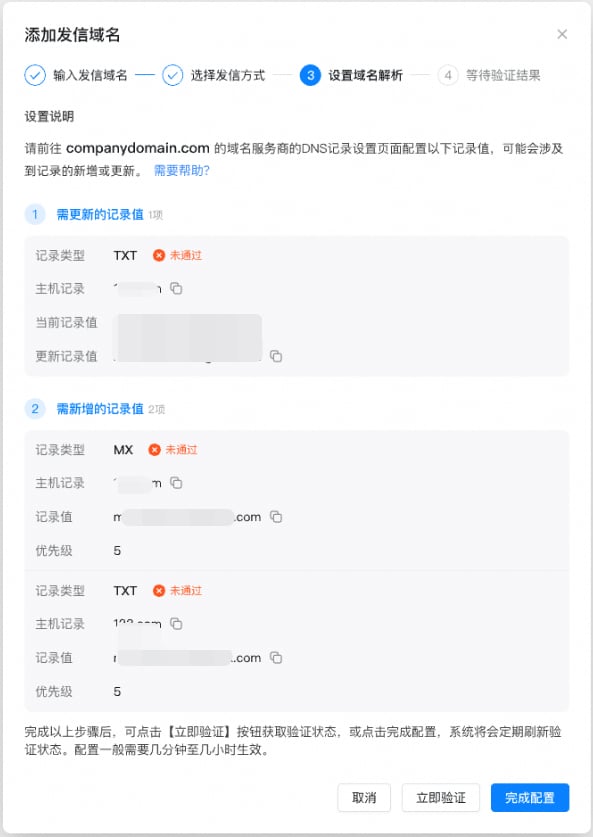
4
Wait for verification
DNS changes normally take a few minutes to several hours to propagate. Sendify checks the records automatically.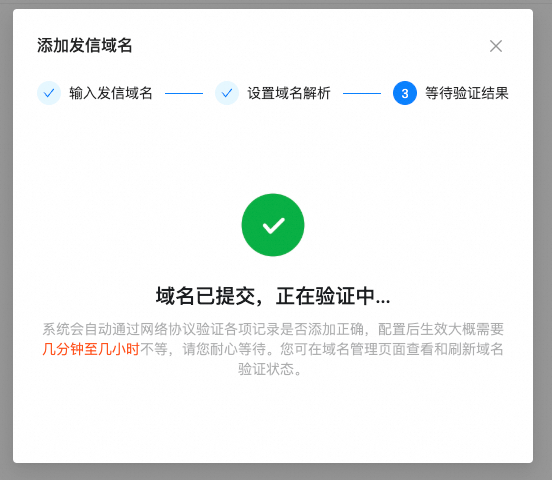
Example: configure records in Alibaba Cloud DNS
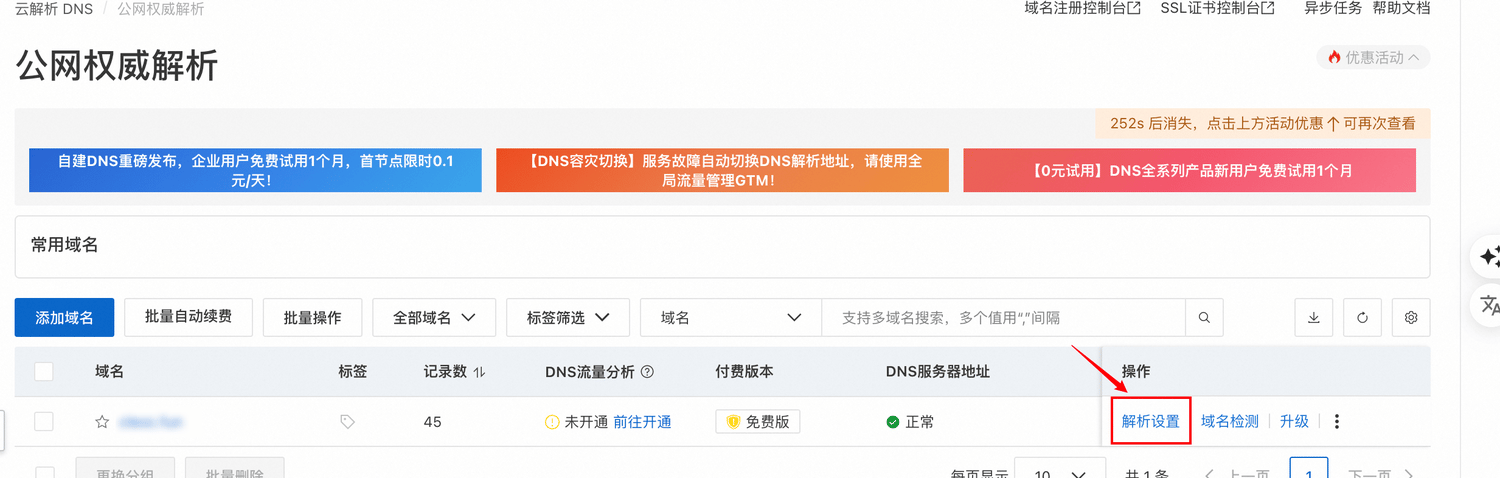
1
Open DNS settings
2
Add each DNS record
Copy each host, record type, and value from Sendify. 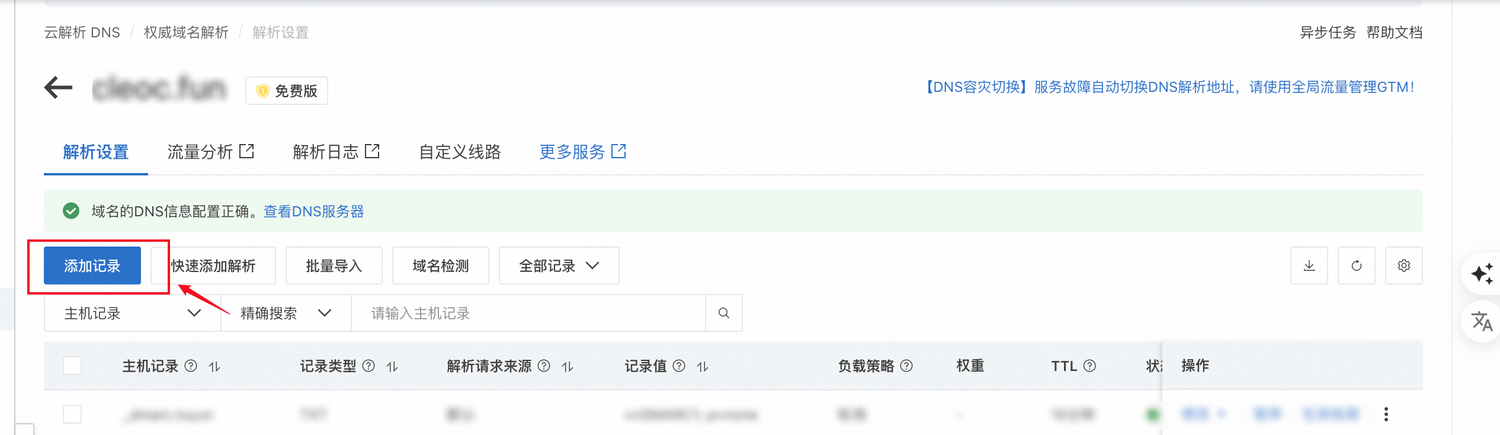
3
Save and wait
Return to Sendify after saving and wait for verification.
DNS record glossary
- MX: Identifies the servers that receive mail for your domain.
- SPF: Lists the servers allowed to send mail on behalf of your domain.
- DKIM: Adds a cryptographic signature that proves the message is authorized and unchanged.
- DMARC: Tells receiving providers how to handle messages that fail SPF or DKIM and can produce abuse reports.
- TXT: May be used by Sendify to verify that you control the domain.
Common DNS providers
Support
Emailsendify-support@dingmail.work or join the DingTalk support group 110245001796 if domain verification fails.