> ## Documentation Index
> Fetch the complete documentation index at: https://docs.sendify.dingstore.cn/llms.txt
> Use this file to discover all available pages before exploring further.
# 快速接入
> 创建 API Key、连接 AI 客户端并完成第一次 Sendify MCP 查询
整个接入过程只需要创建一个 API Key、配置客户端并执行一次真实查询。
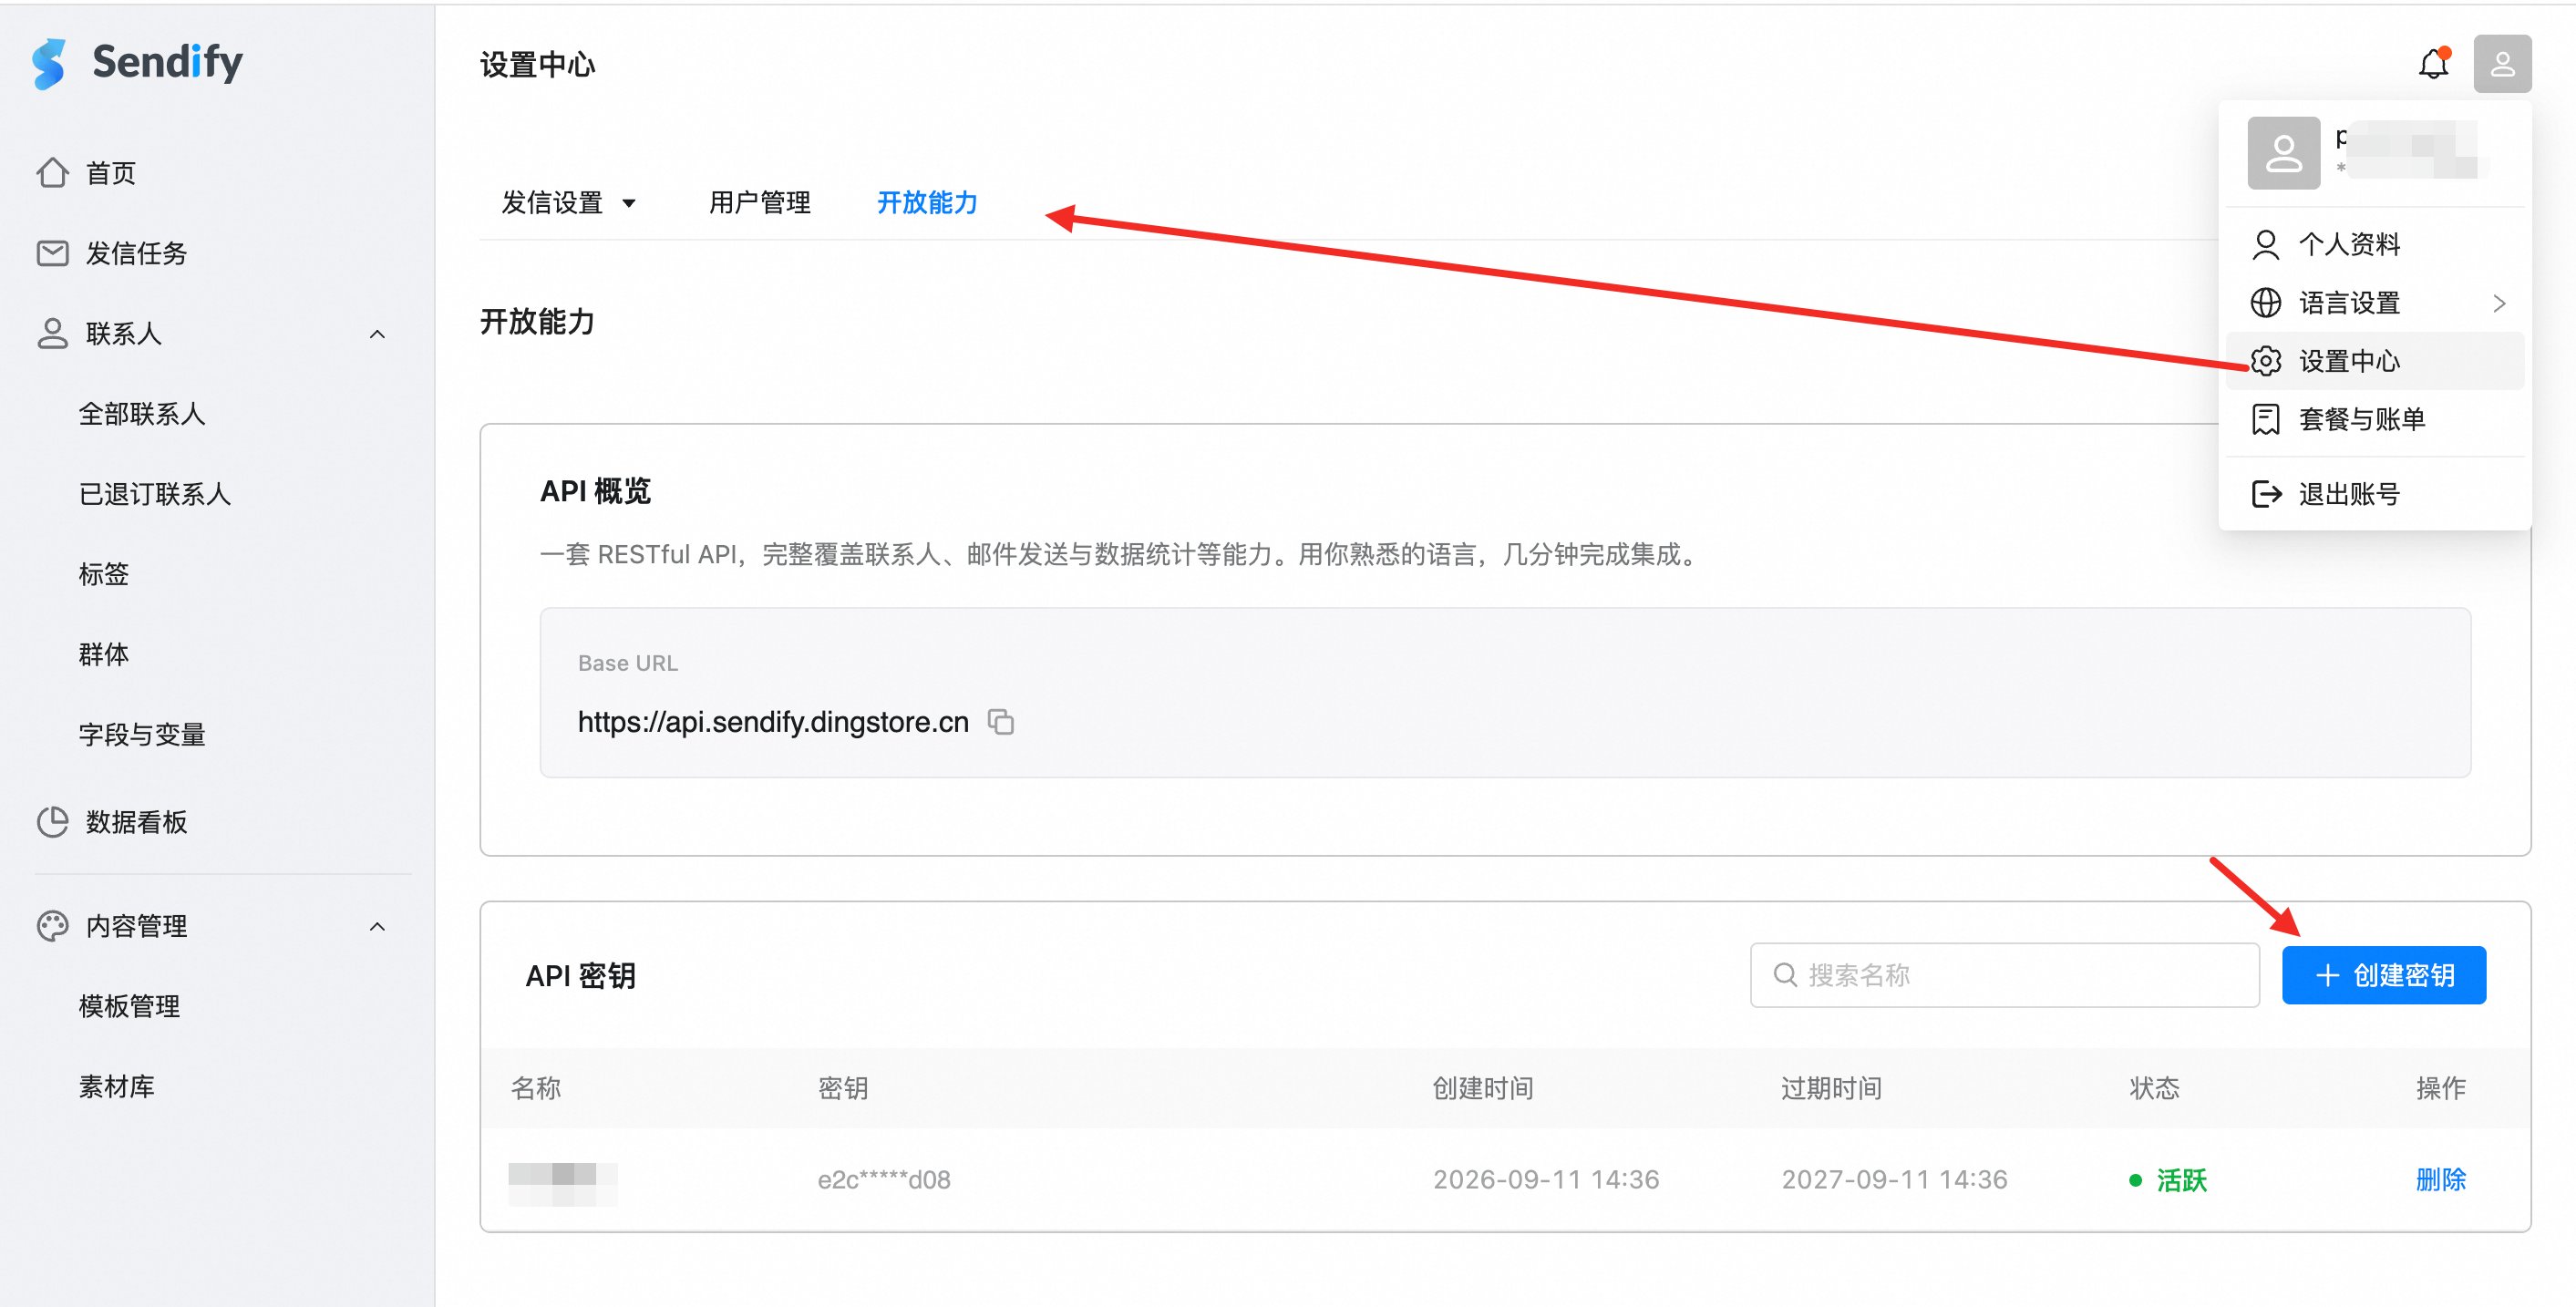
打开 Sendify 控制台,进入以下位置:
```text theme={null}
开放能力 / API 密钥 / 创建密钥
```
建议用“人员 + 客户端”的方式命名,例如 `lili-codex-desktop`、`marketing-team-cursor` 或 `reporting-claude-code`。
API Key 的完整内容只展示一次。请立即保存到密码管理器或客户端的密钥存储中,不要放入 Git、公开文档或共享的 AI 对话。
 使用以下固定信息连接 Sendify MCP:
```text theme={null}
URL: https://mcp.sendify.dingstore.cn/dmx/mcp/v2
Authorization: Bearer YOUR_API_KEY
```
不同客户端的具体配置方式请参阅 [配置 AI 客户端](/mcp/client-config)。
完全重启客户端,然后提出:
> 列出我最近的 20 个 Sendify 营销活动,返回名称、状态和活动 ID。
如果结果中出现你账号下真实的活动名称和活动 ID,说明连接、认证与数据权限均已生效。
## 下一步
查看活动、报告、收件人和联系人工具,以及推荐调用顺序。
在配置客户端前,了解 Bearer 认证、密钥保存方式和安全建议。
This documentation is built and hosted on [Mintlify](https://mintlify.com), a developer documentation platform.
使用以下固定信息连接 Sendify MCP:
```text theme={null}
URL: https://mcp.sendify.dingstore.cn/dmx/mcp/v2
Authorization: Bearer YOUR_API_KEY
```
不同客户端的具体配置方式请参阅 [配置 AI 客户端](/mcp/client-config)。
完全重启客户端,然后提出:
> 列出我最近的 20 个 Sendify 营销活动,返回名称、状态和活动 ID。
如果结果中出现你账号下真实的活动名称和活动 ID,说明连接、认证与数据权限均已生效。
## 下一步
查看活动、报告、收件人和联系人工具,以及推荐调用顺序。
在配置客户端前,了解 Bearer 认证、密钥保存方式和安全建议。
This documentation is built and hosted on [Mintlify](https://mintlify.com), a developer documentation platform.